Ionic for Dummies by Dummies (Part 2) — Lets get coding!

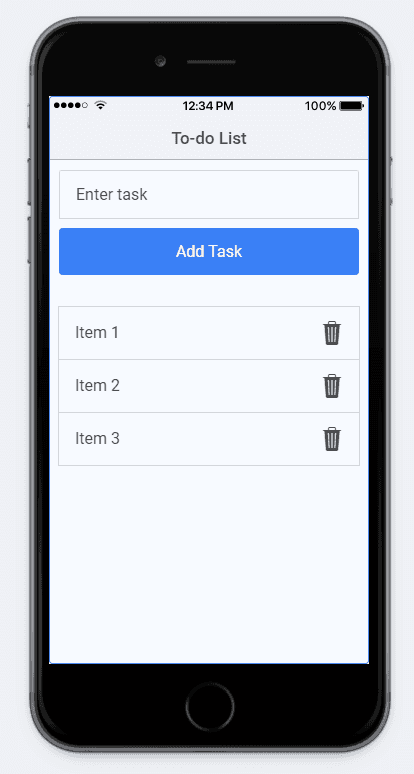
What I hope to implement, as seen above, is a very simple design; a text input to type the tasks, a button to add it to the list, a list view to view the items and finally a delete button to remove the items from the list. I might change up the design later.
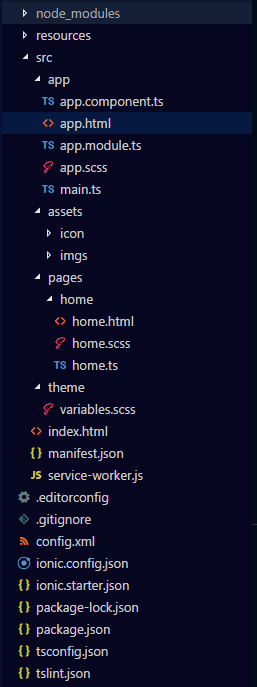
Go ahead and open your editor. Let's take a quick run through all the pages and components found in the current directory.
The Project Structure
- app.module.ts — The entry point of the app. Any and all components, pages, modules, and providers need to be added to this file, as it keeps track and controls the many resources used by the app.
- app.components.ts — The first page that is loaded as the app starts running, with all the code you wish to execute first. Pages that you might wish the user to view first, like the login screen, are put in this component.
- app.html — The template of the app, where the other UI pages will mount onto.
- app.scss — The page that holds all the Sass variables and styles to be used globally within the app.
- Let's head on over to the main component that we will be amending for this application, home.
- As seen above, the home component has three pages;
- home.html — The view/UI of the page is coded here, using HTML.
- home.scss — Any page specific styling is to be added here, along with Sass variables to be used within the page.
- home.ts — The operational logic, in our case adding new tasks to the list, is coded in TypeScript here.
Step 1 — Making it look pretty
To begin, let's tackle the UI first. When you open up home.html, this is the current code in the page.
`
If you get lost, the docs will be your guide.
`
You can then remove everything within the <ion-content> tags. This is the body of the page and elements within those tags will be seen.
Now add an input tag in the body, so we can enter in the task, followed by a button, to call a method to add the task to the list.
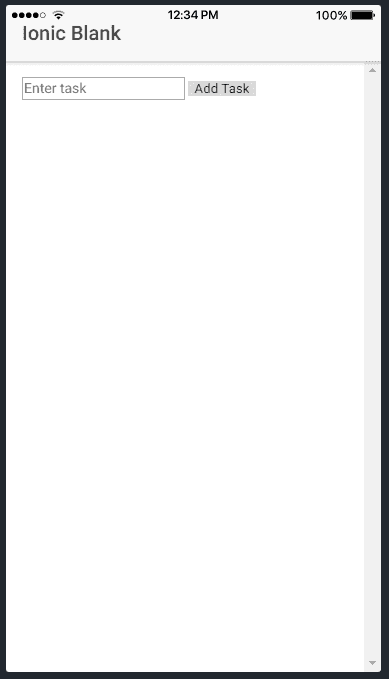
<ion-content padding> <input type="text" placeholder="Enter task"> <button>Add Task</button></ion-content>
Not pretty, right? Lets add some styling now!
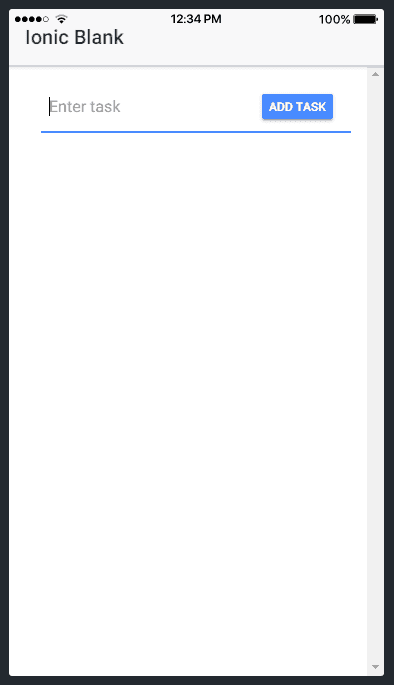
Ionic has a special input tag <ion-input> , that comes with some styling coded within it, so go ahead and switch boring old <input> to <ion-input> !
Ionic also comes with certain special classes which have styling, like the ion-button. I also want to have the button to the end of the input, and not right below. The final changes look like this;
<ion-content padding> <ion-item> <ion-input type="text" placeholder="Enter task" [(ngModel)]="taskName"> </ion-input> <div class="item-note" item-end> <button ion-button>Add Task</button> </div> </ion-item> </ion-content>
much better, right!? And all this without writing any CSS! Lets have another look at the code above.
<ion-item> tag is normally used with the <ion-list> element. But, using this here, with the input within this element, gives it an added style on focus or use. Using the class item-note for a div element allows the button to be in line with the input tag. Doing so, gives a more seamless and sleek design, compared to the first one. Since Angular is also integrated into Ionic, we can use ngModel to easily link values in the views to that in the TypeScript files.
Ionic also comes with a built in pack of icons, Ionicons. Its very simple to use, and a quick example would be substituting the Add task text with <ion-icon name="add"></ion-icon> . Find more on Ionicons, here.
The final result! I’m quite happy with what it looks like now, but feel free to play around more with colors and other styling.
Step 2 — Giving it a reason to look pretty
Now that the UI has been done, let's move on to giving this a function. It’s time to look at home.ts. You start off with code that looks like this;
import { Component } from '@angular/core'; import { NavController } from 'ionic-angular'; @Component({ selector: 'page-home', templateUrl: 'home.html' }) export class HomePage { constructor(public navCtrl: NavController) { } }
Lets get a quick look at what we have here. You import any components or external modules, that you may need to use in this page at the very top. The next few lines describe the template to which the many functions you may write belong to and manipulate. And lastly, all the logic you may code. Any code you wish to execute before viewing or interacting with the page must be written within the constructor.
Since we will be adding new to-dos each time, we need a place to store it. The simplest way to do this is to initialize an array. If you have had experience with JavaScript previously, coding with TypeScript will be a piece of cake! (This makes me crave cake now…. 🎂🤤)
Lets call our list taskList, but since we need the list to be accessed from more than one method of the code, we need to initialize it outside the constructor taskList = [];. Now to write code to handle the Add Task button click, lets call it addTask. All we need to do is capture the text in the input, and push it onto the array. Since we have used ngModel for the input tag, we can easily get the value inside it by using this.taskName. And adding values to an array is as easy as taskList.push(task). We also need to ensure that no empty string is being added to the list, so wrap the above statement in an if condition, checking if the taskName truly exists. The final home.ts code;
import { Component } from '@angular/core'; import { NavController } from 'ionic-angular'; @Component({ selector: 'page-home', templateUrl: 'home.html' }) export class HomePage { taskList = []; constructor(public navCtrl: NavController) {} addTask() { if (this.taskName.length > 0) { let task = this.taskName; this.taskList.push(task); this.taskName = ""; } } }
P.S. Using the keyword let in TypeScript is the equivalent of using var, for variable declaration.
Now we can begin adding new tasks!
But how do we know something is being added?🤔🤔
Easy Peasy, 🍋Squeezy! That’s what the R in CRUD is there for!
Step 3 — View the beauty within
Time to C(reate) a way for us to R(ead) what we type! (See what I did there?)😋
Lets roll back to the home.html. So far, we have put an input tag and a button to add tasks; now to put a list to view it. We now need to link the method addTask() to the button in the (click) property, so that a list item is added to the array with each click.
<ion-list> is a special Ionic element for list views. The <ion-item> tag is used within it to generate each item in said list. *ngFor is an easy method of showing all elements within a list, by setting a standard view for each list item.
The final home.html code;
<ion-header> <ion-navbar> <ion-title>To-do List</ion-title> </ion-navbar> </ion-header> <ion-content padding> <ion-item> <ion-input type="text" \[(ngModel)]="taskName" placeholder="Enter task"></ion-input>

<div class="item-note" item-end>
<button ion-button (click)="addTask()"><ion-icon name="add"></ion-icon></button>
</div>
</ion-item>
<div padding>
<ion-list>
<ion-item *ngFor="let todo of taskList">
{{todo}}
</ion-item>
</ion-list>
</div>
</ion-content>
The variable todo is a temporary store for the element in the current index of the for loop (ngFor) within the list taskList, as declared in the home.ts.
Ready to see our app so far?
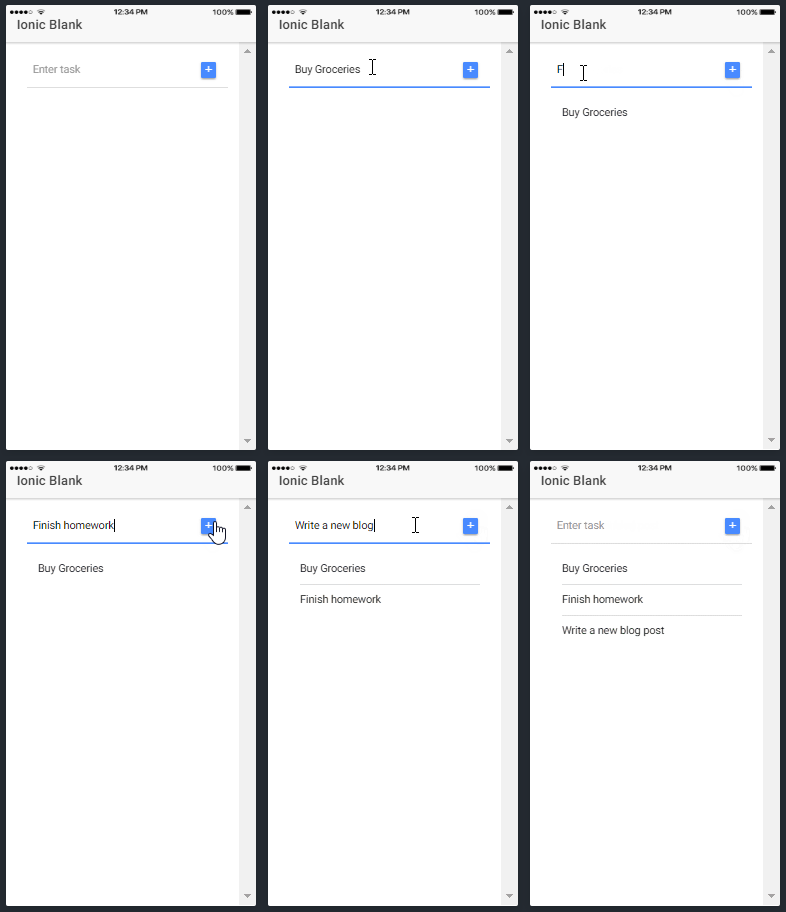
We did it!!
Yay!!! It works!!🎉🎊🎉🎊
Next post, get ready to delete (or update) all the clutter in your list!!
See you next week!!
Find the commit for this step, here.
For more tech tutorials from Sameeha, check out her blog on Medium
